
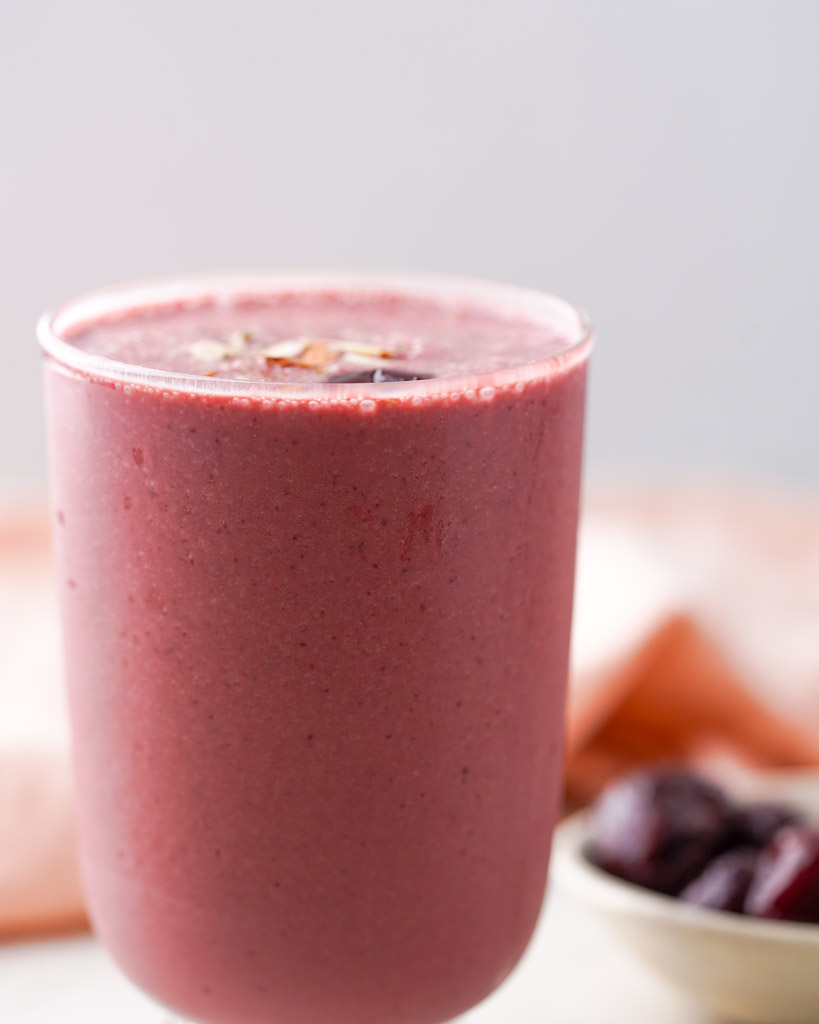
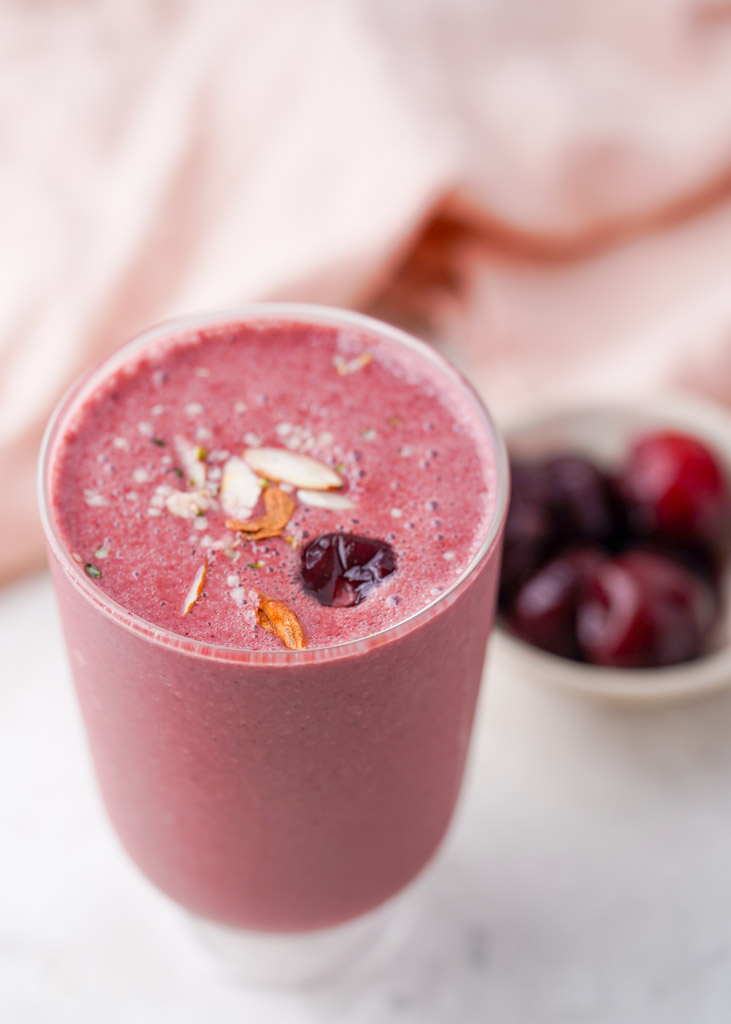
Hydrating Cherry Smoothie
This cherry smoothie is a sweet, tart, creamy blend of dark cherries, hemp seeds, honey, coconut water, and yogurt. Ultra-refreshing and ultra-satisfying, this hydrating healthy cherry smoothie is great for breakfast or a snack. (This recipe is gluten-free, vegetarian, and can easily be made dairy-free.)
For more hydrating, nutrient-dense drinks, check out our Spirulina Chia Fresca or Cherimoya Smoothie next!

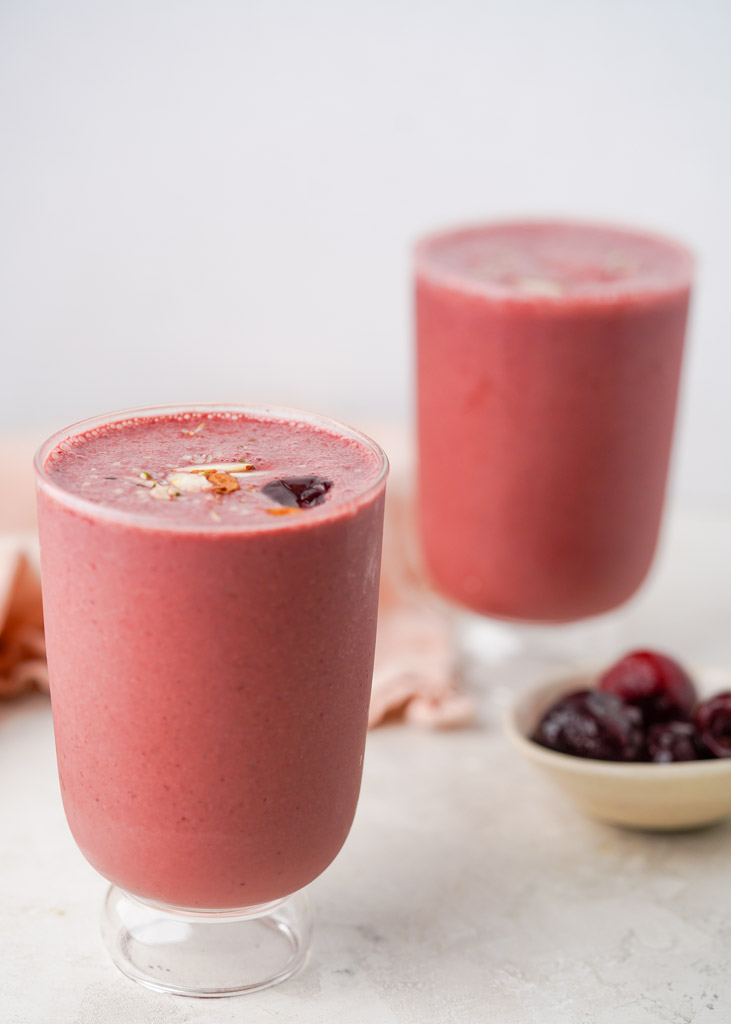
Cherry smoothies are sweet without bananas and creamy without the need for dairy. With a vibrant red color and a frosty consistency, this is the perfect summertime treat! Enjoy the best cherry smoothie poolside on a hot summer day and you'll know true bliss.
Reasons This Cherry Smoothie Recipe Works
- Quick & Easy! This takes less than 10 minutes and just 6 ingredients to prepare.
- A Healthy Snack! This is a nutritious alternative to sugary cereals. Each smoothie is filled with electrolytes, protein, and minerals.
- Family Friendly! Kids and adults alike will enjoy these sweet cherry smoothies.
Cherry Benefits
Cherries are a superfood, with plenty of health benefits. Here are a few:
An Excellent Source of Antioxidants
They combat chronic diseases like diabetes by lowering blood pressure levels. They maintain liver health and aid in freeing the body of toxins.
Anti-Inflammatory Properties
They help reduce inflammation with their anti-inflammatory properties. This assists with muscle recovery and relieves soreness post-workout. Cherries can also improve inflammatory conditions like arthritis and gout.
Contains Natural Melatonin
Consuming cherries improves overall sleep quality. Melatonin regulates the sleep cycle for a better night's rest.
Improves Brain Health
The anthocyanins that give the cherries that distinct red hue are also linked to brain health and improved memory.
Vitamin Rich
Cherries contain Vitamins C, A, & K. Vitamin C protects cells from free radicals, preventing cell damage which leads to illness and aging. Vitamin A protects the immune system and Vitamin K promotes healthy bones.

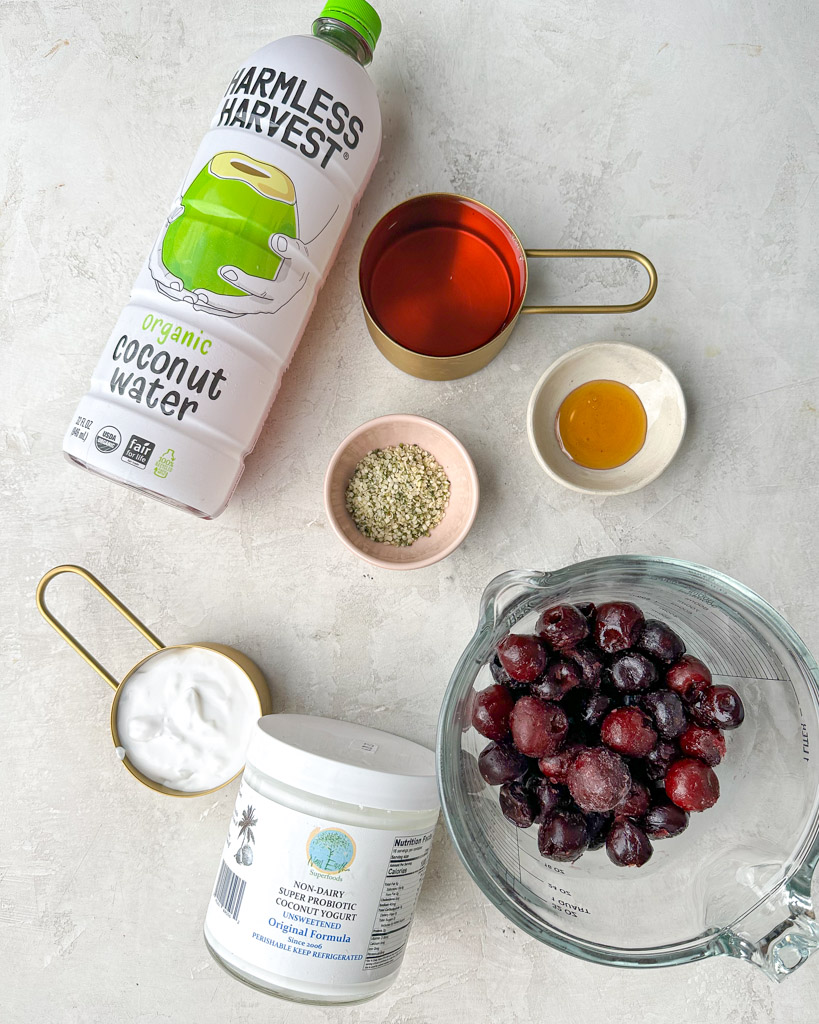
Ingredients You’ll Need
- Frozen Dark Cherries: Dark cherries are sweeter than regular cherries, which tend to be more tart. Whether you prefer sweet cherries or tart cherries, I suggest using frozen cherries. You can enjoy smoothies year-round and they also provide a better texture. If using fresh cherries, ensure they are pitted.
- Yogurt of Choice: I use dairy-free cashew yogurt for a creamy texture. This is a great source of good bacteria or probiotics, which promote gut health. Probiotics prevent the growth of harmful bacteria. Aside from being beneficial to overall health, probiotics are also responsible for the tangy taste most people associate with yogurt. If you prefer dairy, try vanilla Greek yogurt instead.
- Hemp Seeds: This healthy fat includes omega-3 and omega-6 fatty acids and provides fiber.
- Coconut Water: This beverage is loaded with electrolytes and has hydrating qualities.
- Honey: This is a healthy alternative to sugar because it's better for blood sugar levels.
- Ice Cubes: Use as desired to thicken the smoothie.
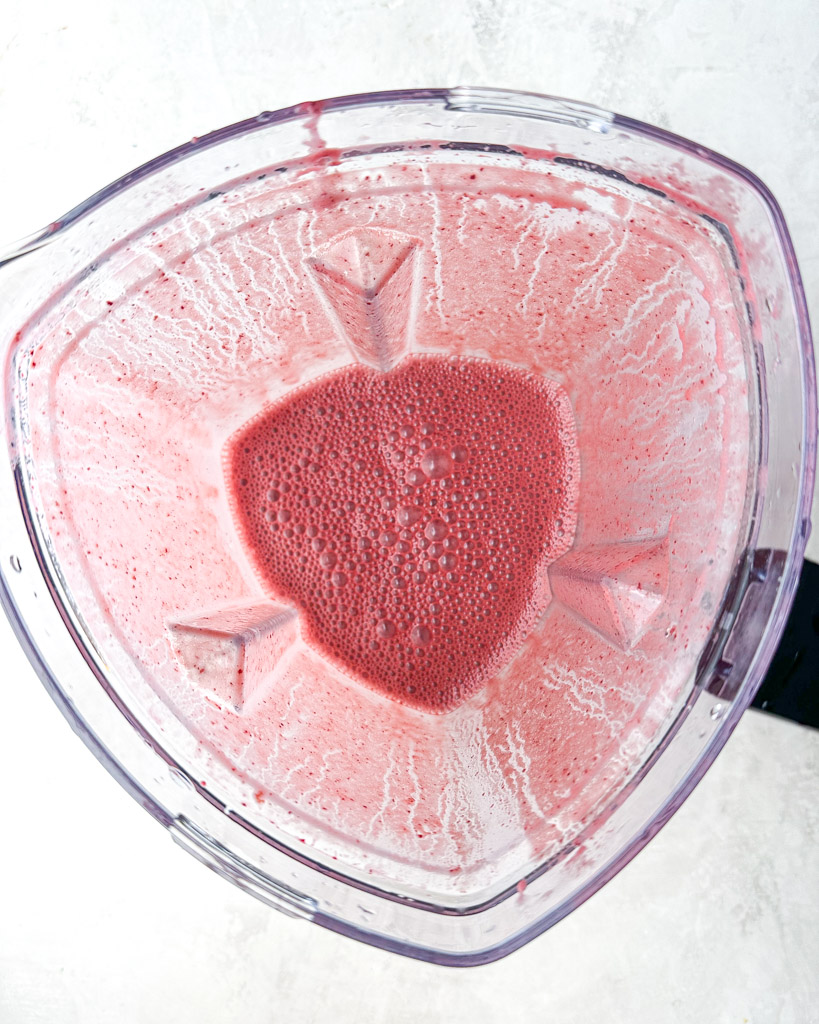
How to Make a Cherry Smoothie
BLEND. Combine all the ingredients in a high-powered blender and blend until smooth.
ADJUST AS NECESSARY. If your smoothie is thicker than you’d like, add more liquid. If you would like your smoothie thicker, add ice or more frozen fruit, until you reach your desired consistency.
Tips To Nail this Cherry Smoothie Recipe
- If your cherry smoothie is too thick, add more coconut water. If it's too thin, try adding more ice cubes until you reach your desired consistency.
- Use a high-powered blender for the best results.
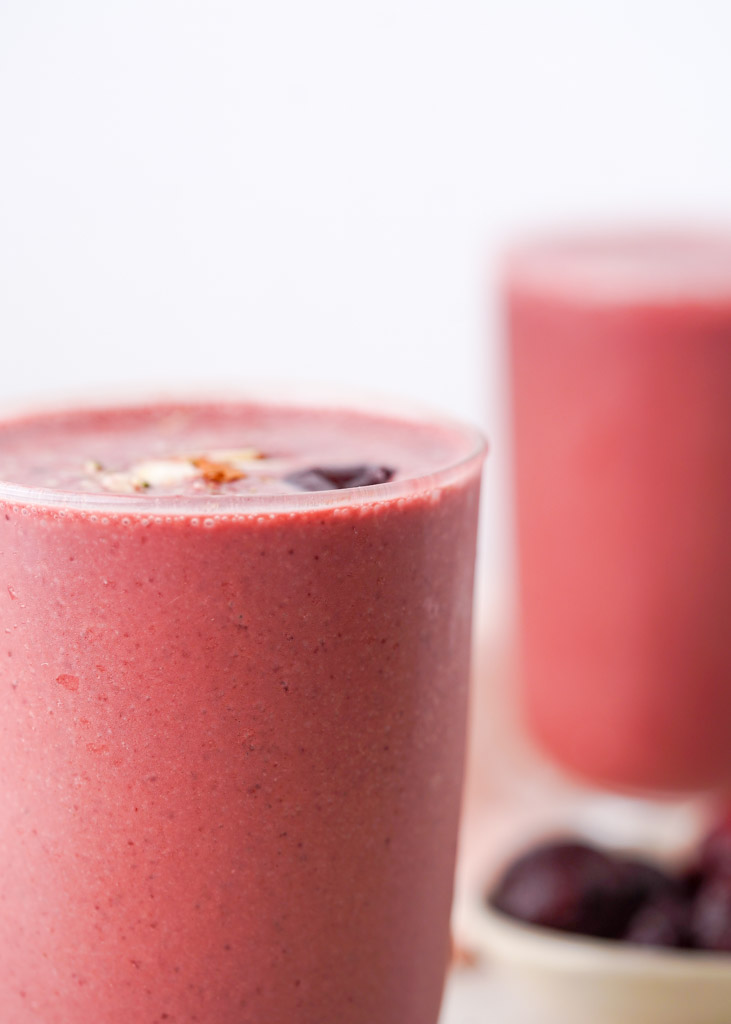
- Garnish with fresh cherries for a pretty presentation.
- Never blend cherries with the pits still inside. They contain cyanide which is poisonous.

Variations
- VEGGIES. Add spinach or kale. It will alter the color but you'll barely taste it, and have even more nutrients.
- FRUIT. Many cherry smoothie recipes include frozen bananas or berries.
- JUICE. For a sweeter smoothie, use a splash of apple juice or cherry juice.
- MILK. If using milk, try a non-dairy alternative like unsweetened almond milk, oat milk, or coconut milk.
- OTHER ADD-INS. Try adding other ingredients for added flavor, texture, and nutrition. I suggest ingredients like almond extract, rolled oats, chia seeds, almond butter, protein powder, pitted dates, nut butter, flaxseed, cocoa powder, or avocados.
Storage
Store the leftover cherry smoothie in an airtight container in the freezer for up to 2 days. When you want to drink it, let it sit at room temperature for about 10 minutes then reblend, adding some liquid.
FAQs
Can I put cherries in a blender?
You can definitely place pitted cherries in a blender. The pits contain cyanide which is poisonous, so always make sure to remove them.
Are cherry smoothies good for you?
Absolutely! Cherries are an excellent source of vitamins, minerals, and antioxidants.
Are cherry smoothies better with milk or juice?
This recipe contains neither. I use non-dairy yogurt instead. Adding juice to smoothies results in a sugary drink so for health benefits, milk is the better choice.
I Hope You Enjoy This Cherry Smoothie Recipe!
If you try the recipe, don’t forget to rate the recipe and let me know what you think in the comments. Leave a quick review & star rating ★ below!
Cherry Smoothie
This cherry smoothie is a sweet, tart, creamy blend of dark cherries, hemp seeds, honey, coconut water, and yogurt. As quick and easy to make as it is refreshing and satisfying, this hydrating, healthy cherry smoothie is great for breakfast or a snack. (This recipe is gluten-free, vegetarian, and can easily be made dairy-free.)
- 2 cups Frozen Dark Cherries
- ½ cup Yogurt of Choice
- 1 tbsp Hemp Seeds
- 1 cup Coconut Water
- 1 tbsp Honey
- ½ cup Ice Cubes (as desired to thicken the smoothie)
- Combine all the ingredients in a high-powered blender and blend until smooth.
- If your smoothie is thicker than you’d like, add more liquid. If you would like your smoothie thicker, add ice or more frozen fruit, until you reach your desired consistency.

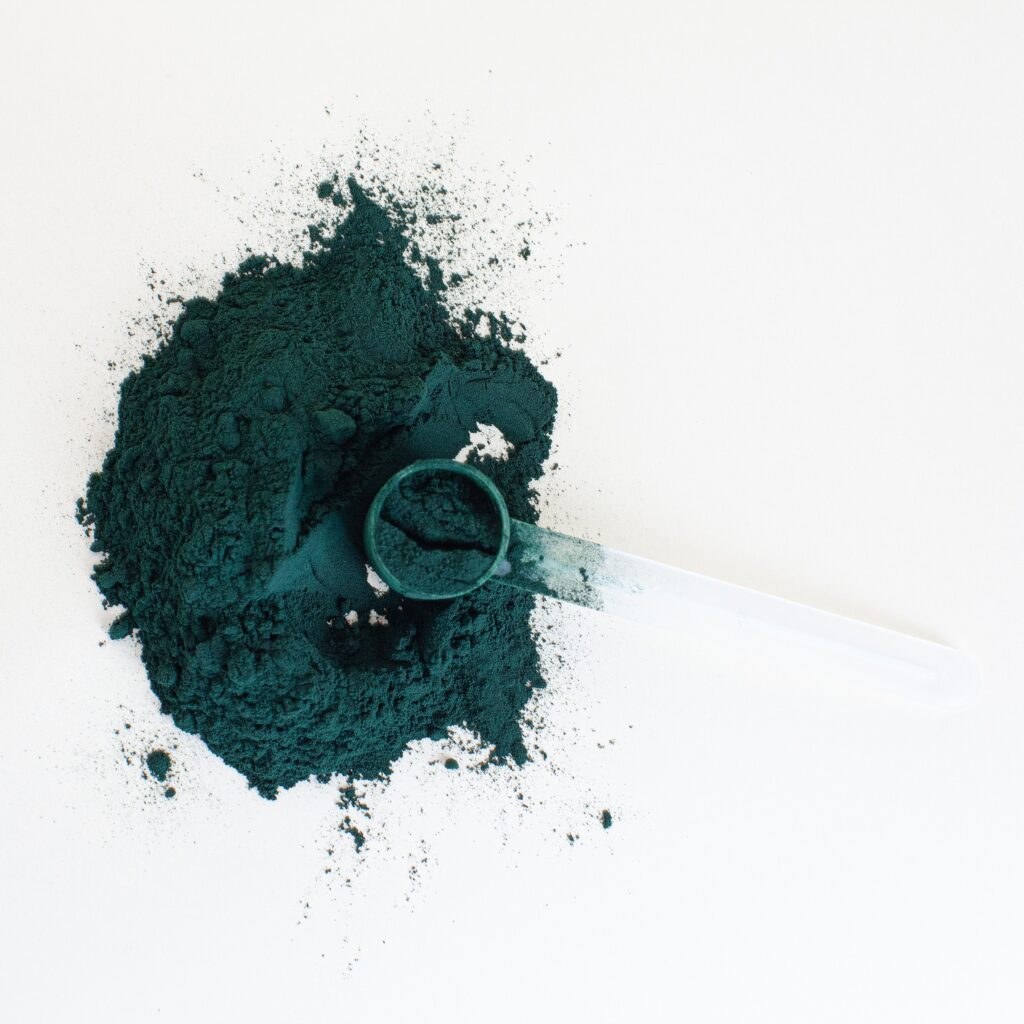
What Is Spirulina? 10 Benefits of Spirulina
Spirulina is an edible blue-green algae packed with minerals, vitamins, and antioxidants that naturally nourish the body. This plant-based protein, most often consumed as a supplement, has been heralded as a superfood. Let's discuss the many benefits of spirulina, its potential side effects, and how to implement it in your diet.
What is Spirulina?
Spirulina is a nutrient-dense food that derives from the sea. It is a cyanobacteria (single-celled microbe) most commonly referred to as blue-green algae. It was first used by the Aztecs, dating back to the 1300s.
While it was once limited to health food stores, its popularity has skyrocketed in the past few years. You may have seen it flashed across social media as a buzzword or noticed it on the menu at your favorite smoothie shop. Even NASA astronauts use it for nutrition.
But the truth is, spirulina is excellent for general health so it really does deserve all the hype.
Health Benefits of Spirulina
So what are the benefits of spirulina?
1. Detoxifies
The nutrients present in this superfood promote the elimination of toxins. Consuming it aids in the elimination of heavy metals in the body (i.e., nickel, cadmium, and lead).
2. Boosts Immune System
It has more immune-boosting properties than both blueberries and carrots. It increases the white blood cells which produce antibodies. Antibodies help your body fight off infections.
3. Supports Gut Health
Spirulina is easy to digest and actually improves digestion. Consuming it can also assist in the growth of healthy gut bacteria known as probiotics.
4. Improves Sinus Health
Use it to combat seasonal allergies. It helps to expel mucus, relieve a runny nose, nasal congestion, and alleviate general allergy symptoms. it can also restrict histamines, which can trigger allergic reactions.
5. Anti-Cancer Properties
The antioxidants present in this plant-based protein combat free radicals (a harmful molecule). Antioxidants also reduce inflammation, decreasing the risk of diseases like cancer. In one study, spirulina was effectively used to shrink oral cancer tumors.
6. Protein Rich
It is packed with amino acids (the building blocks of protein) so it's super nourishing. In fact, spirulina is 60% protein so it's one of the best natural sources of protein. It's great for those who are malnourished.
7. Excellent Source of Iron
Spirulina has more iron (and less calories) than spinach. It helps with period symptoms. It is excellent for those with anemia because it boosts the hemoglobin content in red blood cells.
8. Good for Brain Health
A spirulina-rich diet leads to less oxidative stress. Oxidative stress increases chronic issues in the brain, including stroke, Alzheimer's disease, and Parkinson's disease. The edible algae is also a great source of omega-3 fatty acids. Fatty acids help combat anxiety and depression.
9. Supports Heart Health
The anti-inflammatory properties of spirulina can reduce the risk of heart disease. It can improve blood cholesterol levels and triglycerides so those with high blood pressure should definitely try it to help lower blood pressure.
10. Helps Manage Diabetes
The superfood can prevent diabetes or assist in controlling chronic disease. Consuming it lowers blood glucose levels and the protein keeps blood sugar levels under control.
How to Use Spirulina
Take it as a dietary supplement in tablet form or as a powder.
- Drinks: Use spirulina powder to make nutritious, refreshing drinks like this Spirulina Smoothie and Detoxifying Spirulina Fresca Drink. It's most popularly used in smoothies and smoothie bowls, but it's also great in teas and even cocktails.
- Sauces, Dips & Spreads: Incorporate it into pesto, guacamole, and hummus.
- Healthy Snacks: Add a spoonful of the powder to Date Balls for extra nutrition.
Note: Although it can be added to recipes of your favorite foods, I do not suggest drinking it plain with just water. It comes from the sea so it has a slightly fish taste that works better when combined with other foods and flavored liquids. It also has a distinct blue-green hue that may make it less appealing in certain dishes (i.e., soups and stews).
Who should not eat spirulina?
Although it has many benefits, certain people should avoid using spirulina or consult with a registered dietitian.
- It is a natural blood thinner so those with blood disorders should consult with their healthcare provider before adding the supplement to their health regimen.
- Those with autoimmune diseases like HIV, arthritis, or lupus should not use it because it impacts the immune system. For that same reason, pregnant people should not consume it either.
- Individuals with phenylketonuria (a metabolic disorder) should not take it because their bodies can not process amino acids.
Side Effects of Spirulina
There is a slight chance that you will encounter one of the following when consuming this:
- Nausea
- Diarrhea
- Vomiting
- Dizziness

FAQ
What is blue spirulina?
Blue spirulina is phycocyanin, a component of spirulina, not a variety of it. Therefore, it doesn't have the same benefits. It is an extraction of the plant-based protein.
What is spirulina powder?
It is the powder form of spirulina. The powder is consumed as either a beverage or food item.
Are you supposed to take spirulina every day?
Although there is no set rule, you can consume up to 4 grams per day.

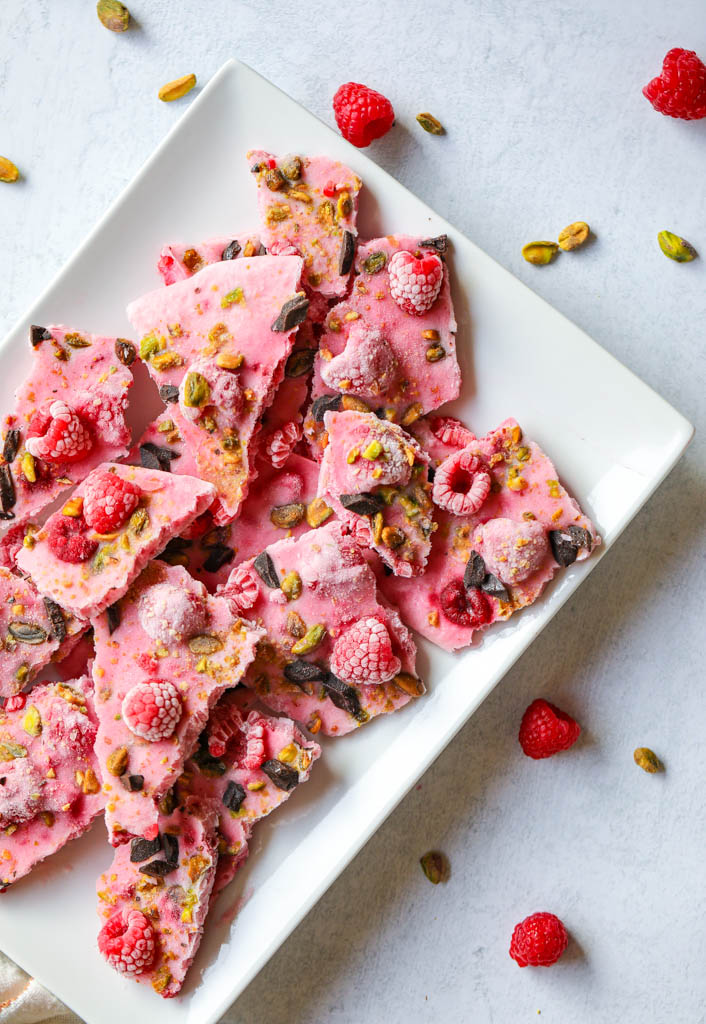
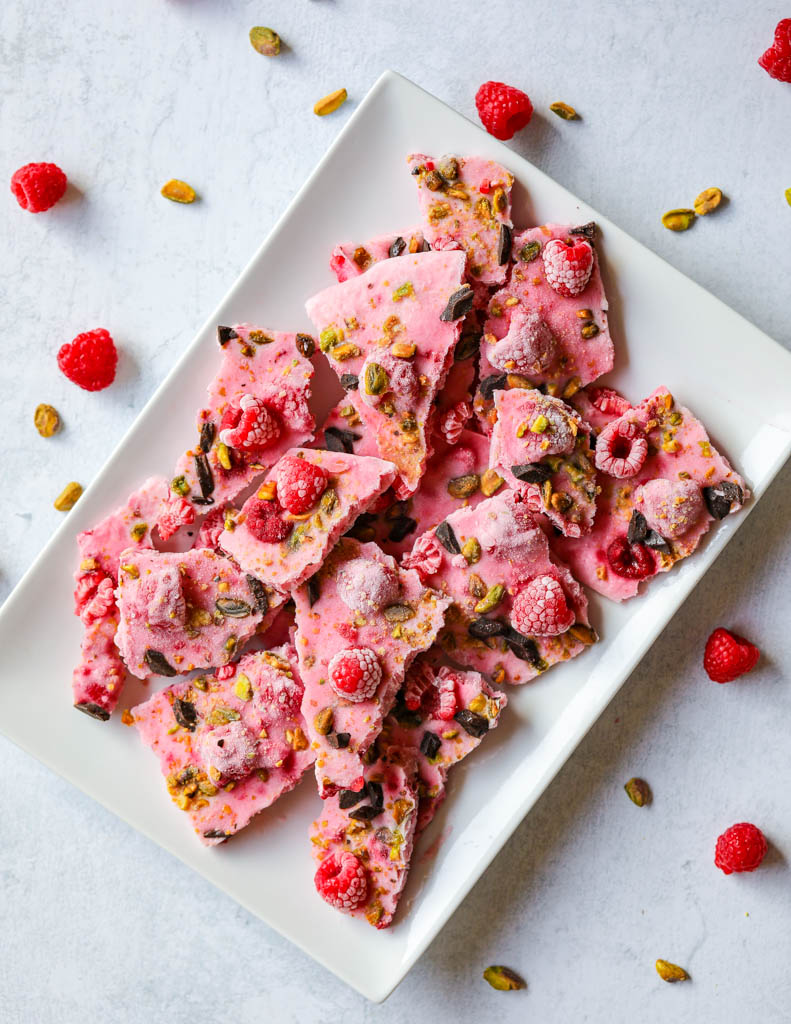
Frozen Yogurt Bark
This Frozen Yogurt Bark recipe is a delightful and refreshing treat for breakfast or as a snack straight from the freezer! It's a great way to enjoy protein-rich yogurt with delicious and nutritious additions, including sea moss gel! (This recipe is Gluten-Free, Dairy-Free, Vegan, and can be made Paleo/Whole30!)
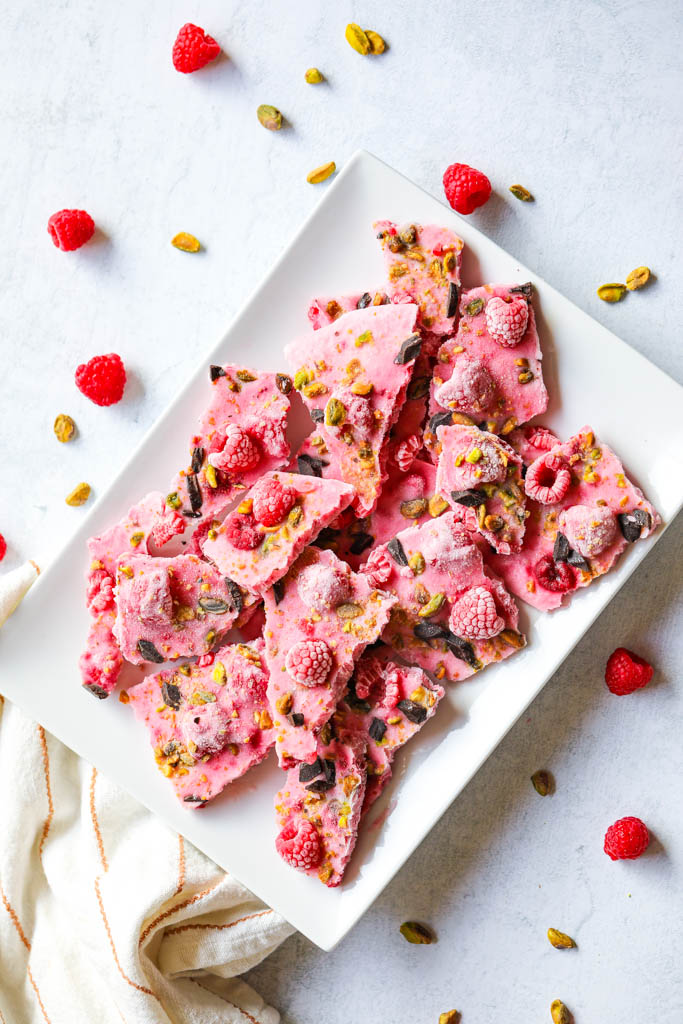
Yogurt, raspberries, chocolate, and pistachios combine in this yogurt bark recipe for a healthy snack, breakfast, or even a charcuterie board addition! Plus you can enjoy this bark with various berries, nuts, and types of yogurt to tailor it to your liking!

Reasons This Yogurt Bark Recipe Works
- Simple Ingredients and Steps! This is a perfect recipe to share with kids to get them into the kitchen, and it only has 7 healthy ingredients!
- Easily Customizable! Nearly every ingredient can be swapped to your preferences, or what you have on hand in your home. For example, switch pistachios for almonds or other nuts, raspberries for your favorite berry (strawberries + chocolate is a classic combo!), and use honey or maple syrup instead of agave.
- Fulfills Your Fro-Yo Cravings! A homemade, low-sugar way to eat frozen yogurt - what could be better? With this recipe, you get all the goodness you want without sacrificing nutrient-density.
Ingredients You'll Need
- Non-dairy Yogurt: Of course, you need yogurt for frozen yogurt bark as it provides the creamy base for this recipe! You can choose your favorite, but I recommend cashew yogurt for a high dose of protein and minerals. Dairy-free yogurts vary but most contain a good amount of protein and healthy fats. Choose a flavored yogurt if you want to make a variation of this bark!
- Agave Syrup: Low on the glycemic index, agave syrup provides a natural sweetness to these yogurt bars! High quality agave syrup contains phytonutrients that can produce an antioxidant effect.
- Sea Moss Gel: This nutrient-dense ingredient is, of course, one of my favorite ways to get a lot of nutrition into my recipes! Adding Sea Moss Gel is totally optional!
- Vanilla Extract: A pantry staple for any fan of sweet treats, vanilla extract and vanilla bean may offer a good source of antioxidant and anti-inflammatory properties as well as possibly benefiting brain health!
- Raspberries: Frozen raspberries and fresh raspberries alike are sweet but tart berries contain potassium, omega-3s, and manganese.
- Cacao Nibs or Dark Chocolate Chips: Choose your favorite or use both! Cacao nibs contain healthy fats and can increase feel-good hormones such as serotonin and dopamine. Dark chocolate has antioxidant benefits, improves brain function and blood flow!
- Pistachios: This mild, almost creamy-flavored nut contains lots of fiber, minerals, and unsaturated fat! It also contains gut-healthy fiber and plant protein, perfect for boosting your energy levels.
How To Make Frozen Yogurt Bars
Cover a rimmed baking sheet or sheet pan with parchment paper. In a large bowl, combine yogurt, raspberries, vanilla extract, sea moss gel, and agave syrup. Then add in raspberries and mix. Spread yogurt mixture onto a baking sheet to about 1/4" thickness and top with pistachios, cacao nibs or chocolate chips, and more raspberries. Freeze for at least 4 hours or overnight, then break apart and enjoy!
Tips To Nail The Recipe
- To create the pink color shown in the photos, smash raspberries into the yogurt mixture before adding toppings.
- Use flavored yogurt to boost the fruity flavor of this treat!
- Stir in a favorite superfood powder such as chaga mushroom powder, ashwagandha powder, or moringa powder! Mix into the yogurt before adding other ingredients for a smooth texture.
- Store leftover yogurt bark for up to 1 month in your freezer! Simply wrap in parchment paper and place it in a freezer-safe bag.
Recipe Variations and Customization
- Try Different Nuts! Use almonds, walnuts, pecans, to vary the recipe.
- Use a Different Type of Fruit! Blueberries, strawberries, blackberries, and even dried goji or dried acai berries would all be delicious in this recipe. Mango would also be a yummy variation to top with coconut flakes for a tropical treat!
- Add Nut Butter! Swirl your favorite nut butter (almond butter, sunflower butter cashew butter, and peanut butter all work well) into the yogurt mixture on the pan before topping. The bark will taste like a PB & J that kids will love!
- Paleo? Make this recipe Whole30 friendly by omitting the agave syrup.
- Nut Free? Sprinkle the top with your favorite granola, rolled oats, sunflower seeds or pumpkin seeds rather than pistachio to add a bit of crunch!

FAQs
Can I use a different type of yogurt in this recipe?
Yes! Choose whichever dairy-free yogurt (or Greek yogurt if you eat dairy) you prefer, and flavored yogurts work too! If you want to boost your calcium, find a fortified yogurt!
How Do I Store Frozen Yogurt Bark?
If you have any leftovers, put them back into the freezer for up to 1 month. Simply wrap in the parchment paper and put it into a freezer-safe bag.
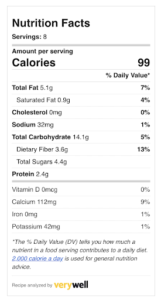
Is Frozen Yogurt Bark Healthy?
Yes, this creamy and delicious treat is healthy The yogurt bark ingredients are nutrient-dense and low in saturated fat, cholesterol, and processed junk! If you're watching sugar, choose a low-sugar yogurt and opt for cacao nibs.
I Hope You Enjoy This Frozen Yogurt Bark Recipe!
If you try the recipe, don’t forget to rate the recipe and let me know what you think in the comments. Leave a quick review & star rating ★ below!
Frozen Yogurt Bark

This Frozen Yogurt Bark is a sweet treat to start your day or a tasty snack between meals! The combination of raspberry, pistachio, and chocolate is heavenly, and you may just eat it all at once!
- 2 cups Non-Dairy Yogurt (like cashew or coconut yogurt)
- 2 tbsp Agave Syrup
- 1-2 tbsp Sea Moss Gel (optional)
- 1 tsp Vanilla Extract
- 2/3 cup Raspberries (fresh or frozen) (plus more for topping)
- 2 tbsp Cacao Nibs or Dark Chocolate Chips
- 1/3 cup Pistachios (finely chopped)
- Line a rimmed baking sheet with parchment paper and set aside.
- In a large bowl, combine the yogurt, agave syrup, sea moss gel, and vanilla. Add in the raspberries and stir until combined.
- Pour the mixture onto the lined baking sheet and spread until about 1/4" thick.
- Top with pistachios, cacao nibs (or dark chocolate chips), and more raspberries.
- Transfer to the freezer and freeze for at least 4 hours or overnight, until firm.
- Remove the bark from the freezer and break it apart using a knife or your hands.
- Enjoy a few pieces for breakfast, dessert, or as a snack.
- Store any remaining yogurt bark in an airtight container in the freezer.
Tip: To get the pink color, mash a few raspberries and mix them into the yogurt until the yogurt turns pink.

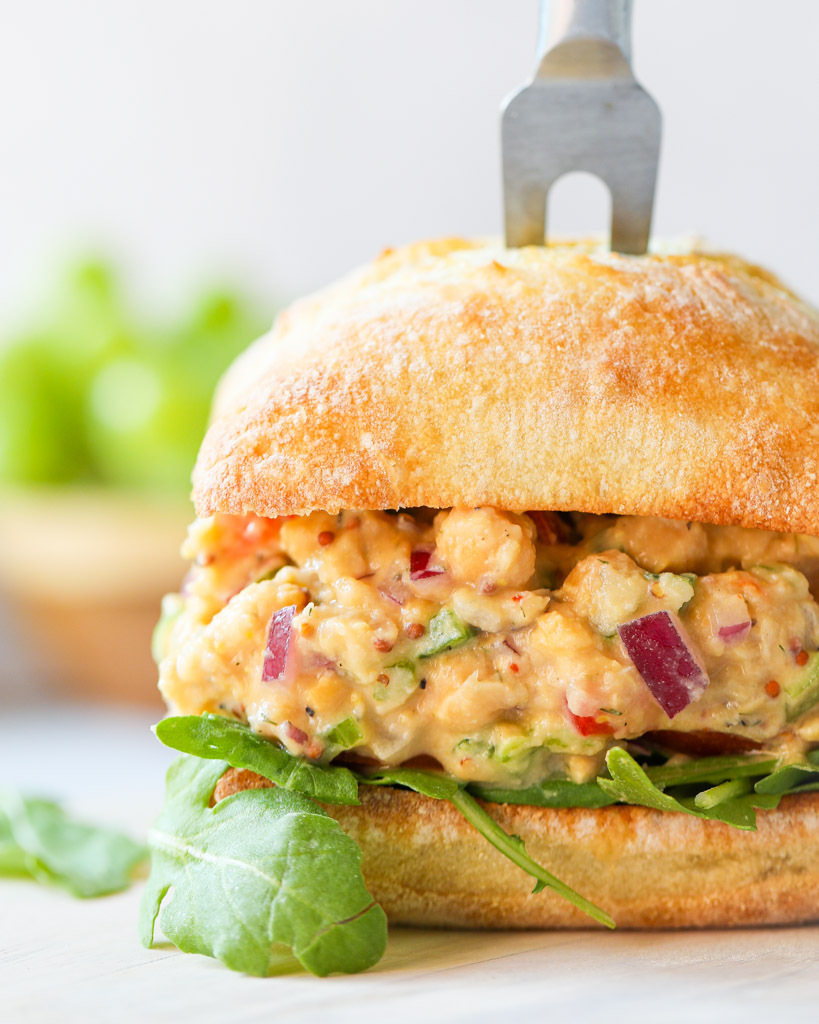
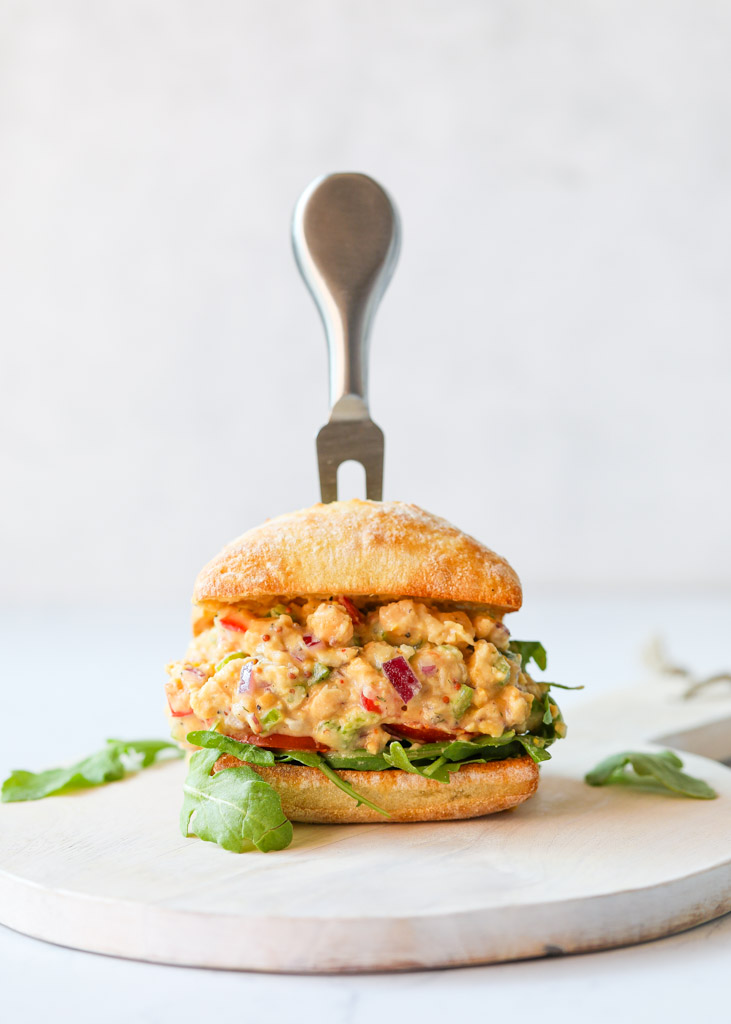
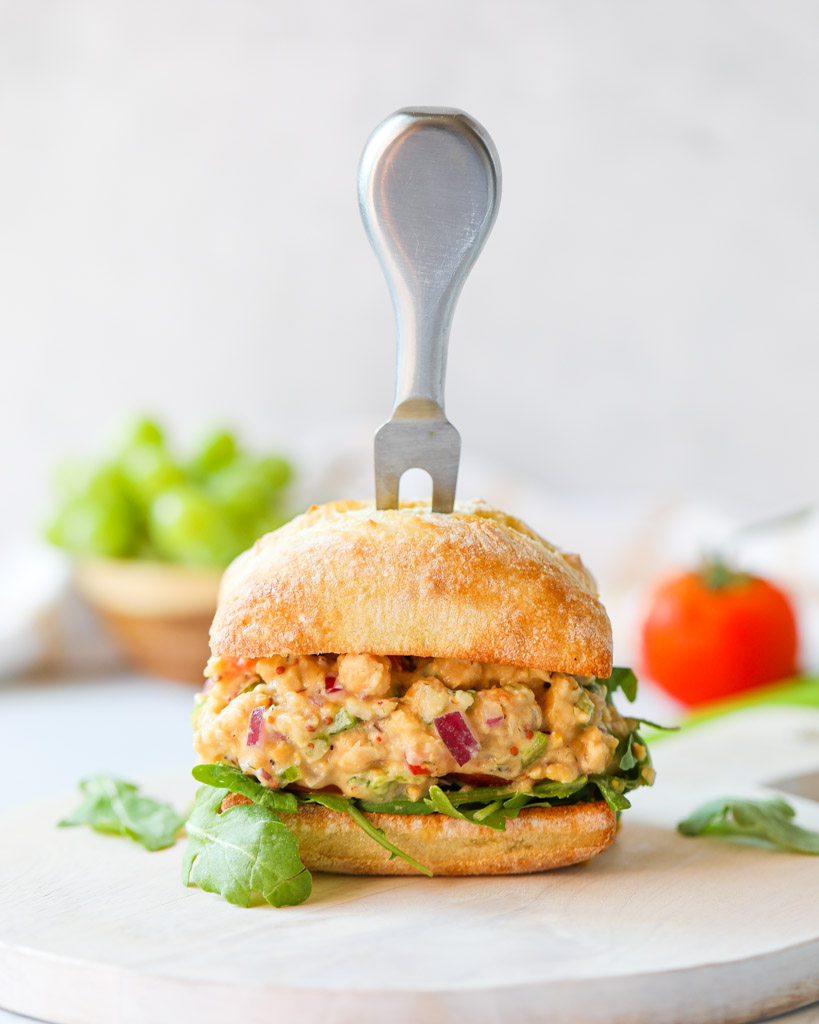
Vegan Chickpea Salad Sandwich
This chickpea salad sandwich is a creamy mix of smashed chickpeas, herbs, and spices. Serve this savory mixture between two slices of bread or in a wrap as a vegan alternative to tuna salad or chicken salad. (This recipe is gluten-free, dairy-free, and vegan.)

This chickpea salad sandwich is the sandwich of my dreams! It’s jam-packed with flavor, super filling, and absolutely mouthwatering. I like to enjoy it for lunch with sliced veggies, homemade sweet potato fries, or potato chips. Paired with Refreshing Cucumber Apple Juice, this is the ultimate meal for lunch!
Reasons This Chickpea Salad Sandwich Recipe Works
- A Healthy Meal! Enjoy a meatless meal that still provides plenty of fiber and protein.
- So Delicious! This vegan chickpea salad sandwich is definitely not bland. It's bursting with flavor and texture from mashed chickpeas, zesty Dijon mustard, and crisp celery.
- Good for Meal Prep! This is easy to prepare and stores well so you can enjoy it for lunch throughout the week.

Chickpea Health Benefits
Chickpeas, also known as garbanzo beans, are a legume packed with nutrients.
Super Filling
Curb your appetite with a food rich in protein and fiber. Both slow digestion, helping you to feel full for longer. This in turn lowers calorie intake, which helps with weight loss and management.
Improves Bone Health
Chickpeas contain calcium and iron, two minerals that strengthen bones and teeth.
Aids Digestion
Chickpeas have soluble fiber which helps to prevent the growth of bad bacteria in the gut and constipation. It also promotes regular bowel movements. Additionally, eating chickpeas regularly can reduce the likelihood of IBS (Irritable Bowel Syndrome) and colon cancer.
Great for Heart Health
Fiber, potassium, and Vitamin B are all found in chickpeas and can lower cholesterol levels. This reduces the risk of heart disease, heart failure, and cardiovascular disease.
Ingredients You’ll Need
- Chickpeas: Rinse and drain the chickpeas before smashing them.
- Celery Stalks: Dice for crunchy bits throughout the sandwich.
- Peppers: I add diced red bell pepper and jalapeño for a kick of spice.
- Basic Cashew Cream: This is the key to a creamy chickpea salad sandwich with no mayo.
- Dijon Mustard: This has a tangy sharp flavor.
- Red Onion: Diced.
- Fresh Lemon Juice: For a touch of bright acidity, add this citrus fruit.
- Dried Dill: Add for a fresh, herby taste.
- Seasoning: I season with garlic powder, salt, and black pepper to taste.
How to Make Chickpea Salad Sandwich
MASH CHICKPEAS. Add rinsed and drained cooked chickpeas to a large bowl. Use a fork or potato masher to mash the chickpeas until you reach your desired consistency.
COMBINE OTHER INGREDIENTS. Add the remaining ingredients to the chickpea mixture and stir until well combined.
SERVE ON BREAD OR IN A WRAP. Enjoy your chickpea salad on sandwich bread or in a wrap with leafy greens and tomato. A good low carb, high protein option is a Cottage Cheese Wrap.
Tips for the Best Chickpea Salad Sandwich
- Remember to rinse the chickpeas before mashing them in order to remove excess sodium.
- You can mash all of the chickpeas or leave about ¼ whole to give the chickpea salad added texture.
- If you don't plan to eat this immediately, store it in the fridge in an airtight container. Add it to bread, a wrap, or serve on a bed of lettuce when you're ready to eat, so the salad doesn't make the other ingredients soggy.
Variations
- Mayonnaise: The cashew cream is a replacement for mayo but you can use vegan mayo instead.
- Tahini: This creamy sesame seed paste is also an excellent option to make creamy chickpea salad without mayo
- Toppings: Add sliced tomatoes, avocados, or pickles.
- Curry: For a curried chickpea salad sandwich, add curry powder to the chickpea mixture. Add raisins for a delicious balance of spicy and sweet flavors.
- Buffalo Chickpea Salad Sandwich: Add your favorite hot sauce directly to the cashew cream or vegan mayo.
- Add Some Crunch: Add crispy chickpeas into your chickpea salad for an added crunchy texture.
Storage
Store any leftover chickpea salad in an airtight container in the fridge for up to three days.
FAQs
Can you eat chickpeas straight from the can to a salad?
Yes. Canned chickpeas are precooked so can be eaten straight from the can.
Why is chickpea salad good for you?
Chickpea is a nutritious addition to a well-balanced diet. It's rich in fiber and protein so it promotes digestion and helps you feel full for longer.
What goes well with chickpeas?
Chickpeas are extremely versatile and can be made with a variety of spices, herbs, and vegetables. They go well with just about anything!
I Hope You Enjoy This Healthy Chickpea Salad Sandwich Recipe!
If you try the recipe, don’t forget to rate the recipe and let me know what you think in the comments. Leave a quick review & star rating ★ below! For more recipes using chickpeas, check out this High-Fiber Salad!
Vegan Chickpea Salad Sandwich

This chickpea salad sandwich is a creamy mix of smashed chickpeas, herbs, and spices. Serve this savory mixture between two slices of bread or in a wrap as a vegan alternative to tuna salad or chicken salad. (This recipe is gluten-free, dairy-free, and vegan.)
- 1 15 oz Can Chickpeas (rinsed and drained)
- 2 Celery Stalks (diced)
- ½ Red Pepper (diced)
- 1 Jalapeño (diced (optional))
- 3 tbsp Basic Cashew Cream ((can sub with tahini or vegan mayo))
- 3 tsp Dijon Mustard
- ¼ Red Onion (diced)
- 1 tbsp Lemon Juice
- ½ tsp Dried Dill
- ½ tsp Garlic Powder
- Salt and Pepper (to taste)
- In a large bowl, add the rinsed and drained cooked chickpeas. Use a fork or potato masher to mash the chickpeas until you reach your desired consistency. You can mash all of the chickpeas or leave about ¼ whole to give the chickpea salad added texture.
- Add the remaining ingredients and mix until well combined.
- Enjoy your chickpea salad on sandwich bread or in a wrap with leafy greens and tomato. Store any leftover chickpea salad in an airtight container in the fridge for up to three days.
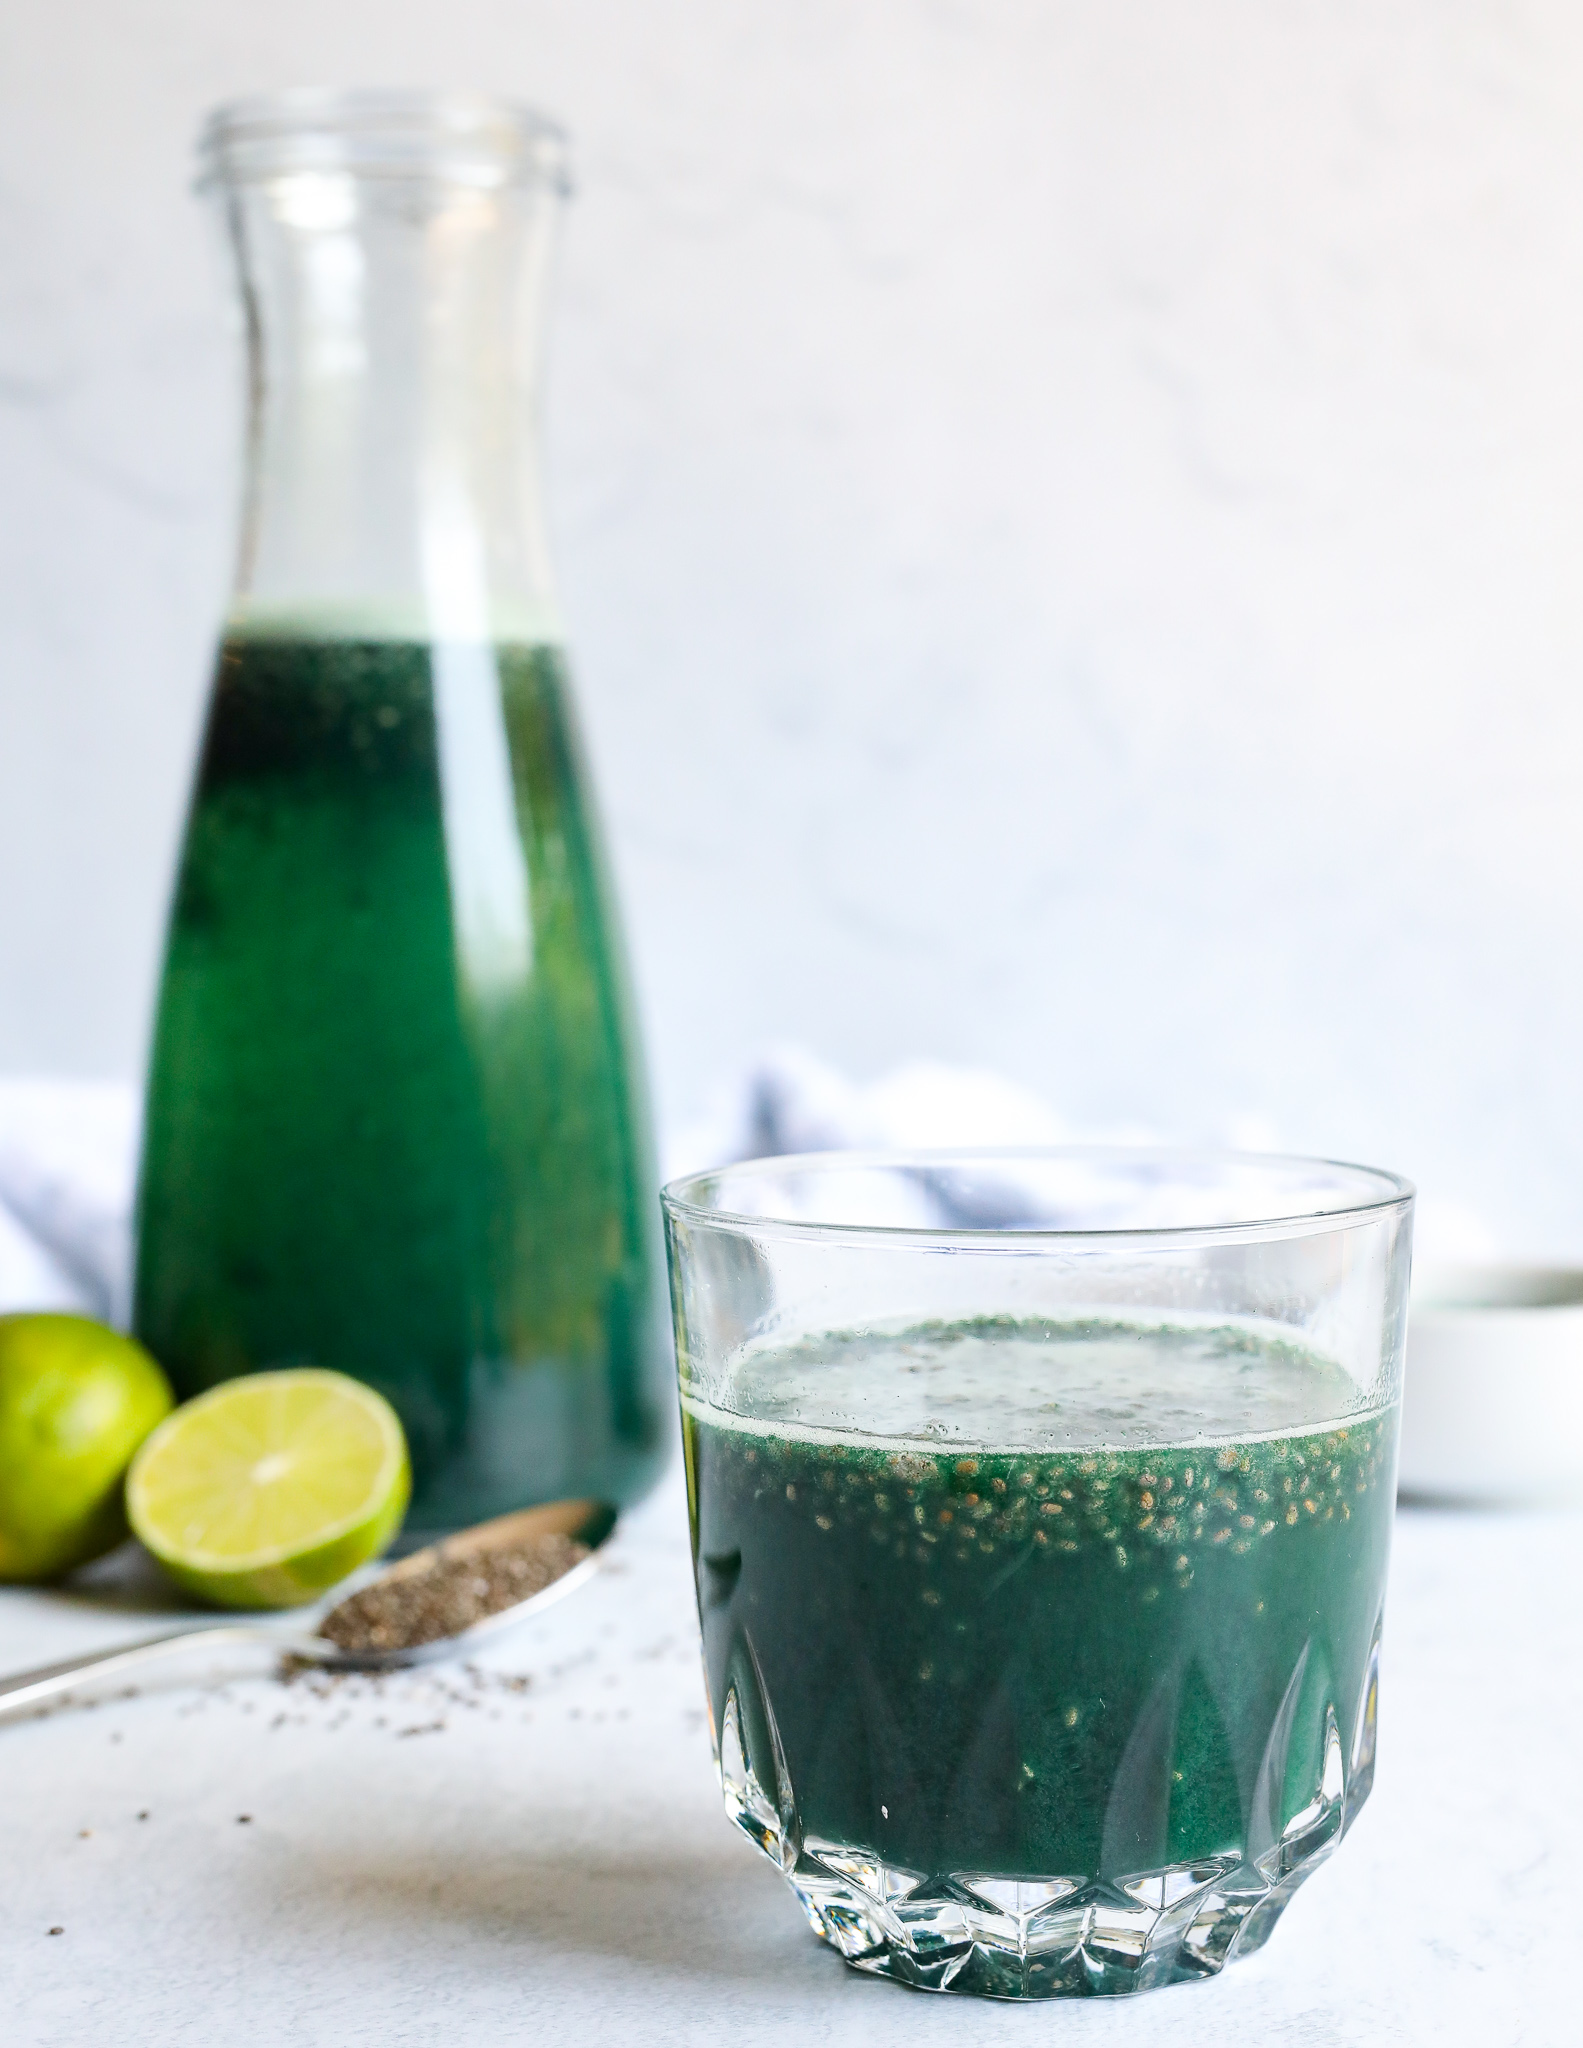
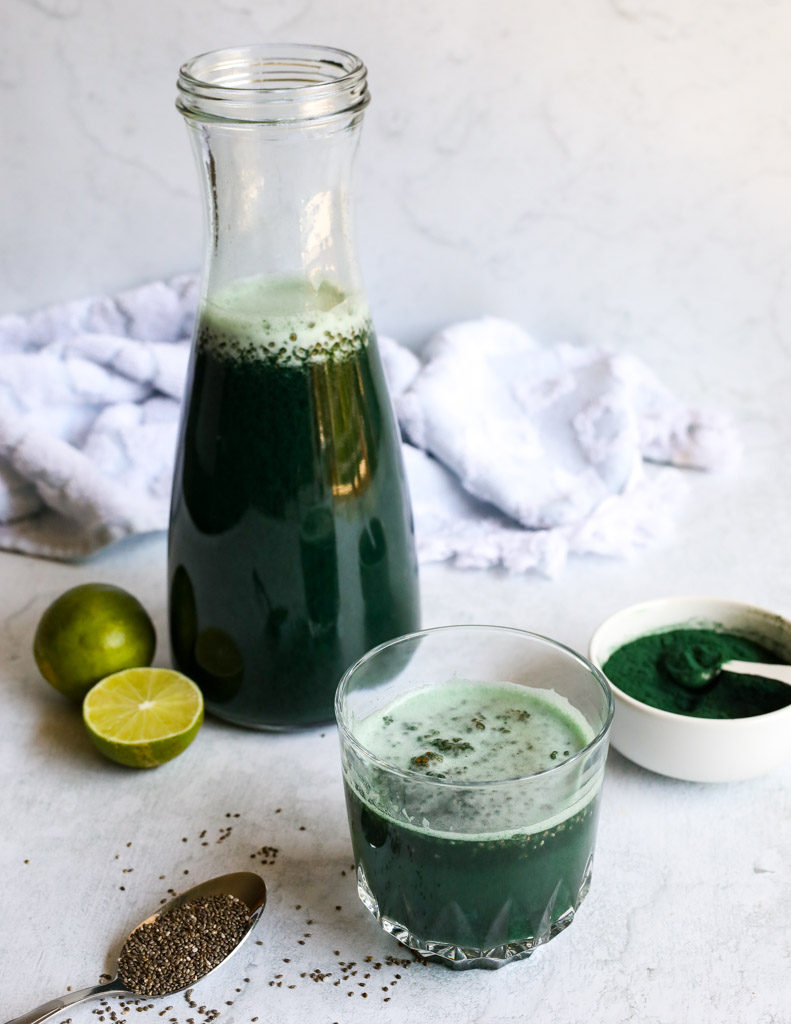
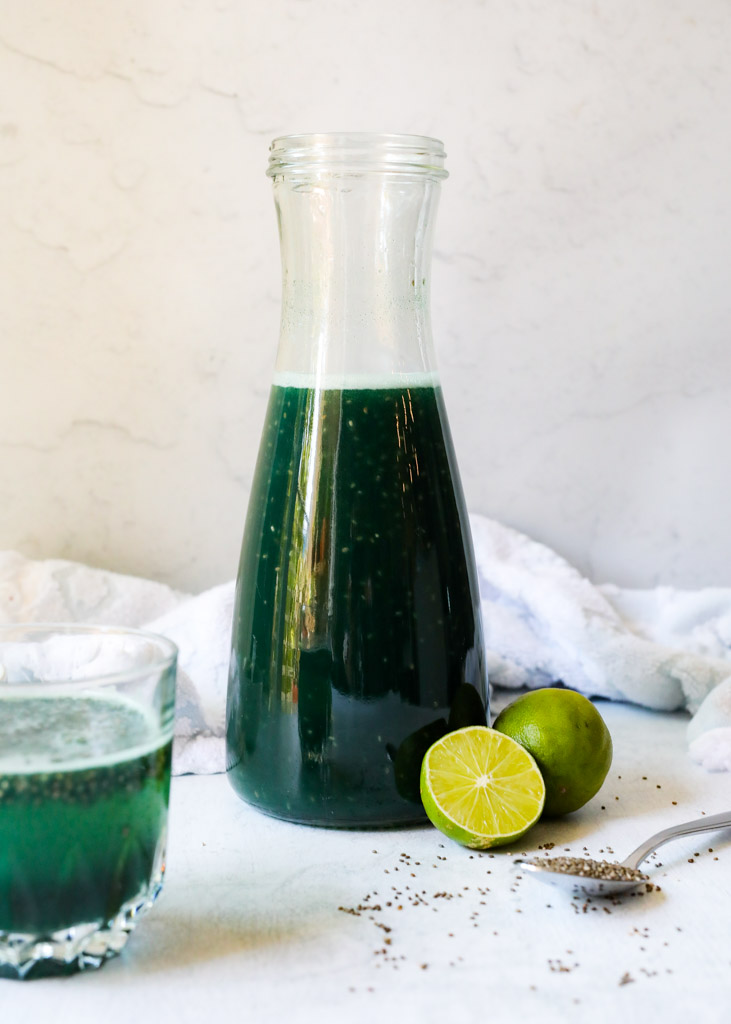
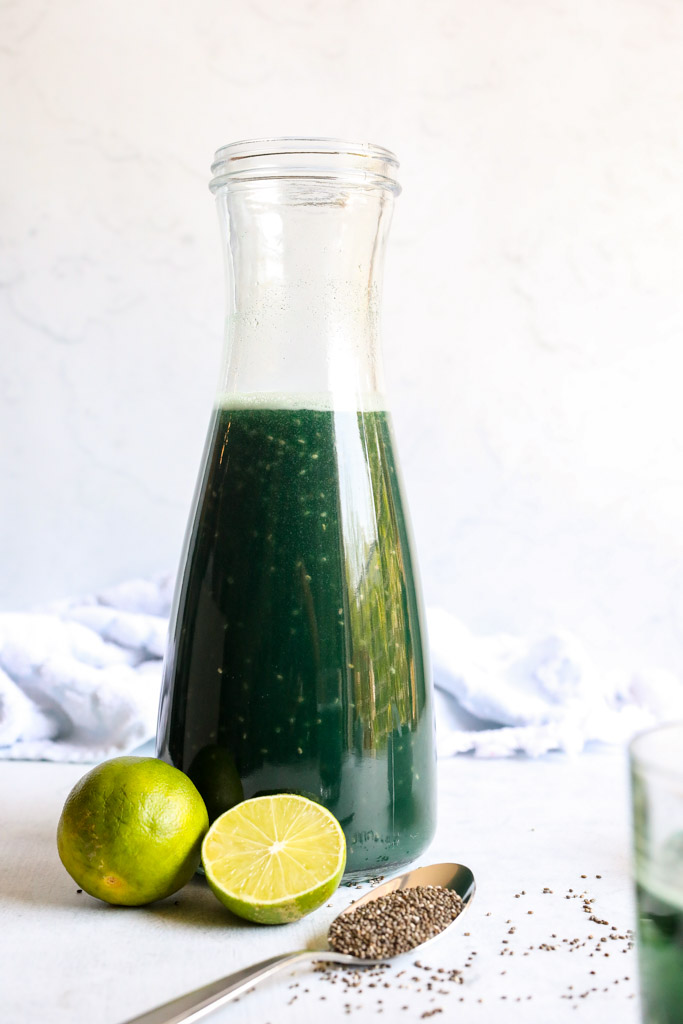
Easy Detoxifying Spirulina Drink
Spirulina Chia Fresca is a nourishing, detoxifying spirulina drink that takes less than 5 minutes to make! Start your mornings with a tall glass of Spirulina Chia Fresca for an invigorating start to your day. Spirulina is high in antioxidants and nutrients that help reduce inflammation, improve brain health, and remove toxins from the body!
For more detoxifying, green drinks, try our Apple Cucumber Juice next!
Spirulina is a type of blue-green algae that grows in both fresh and saltwater environments. It is considered a superfood due to its high nutritional content. This vibrant green alga is packed with goodness and can be a game-changer for your health.
It is often consumed in powder or tablet form and can be easily incorporated into smoothies, juices, or various recipes. Spirulina has gained popularity for its potential health benefits, including boosting energy levels, supporting immune function, improving digestion, and providing potent antioxidant properties.
Benefits of Spirulina
- Increased Energy Levels: Spirulina is rich in vitamins, minerals, and antioxidants, providing a natural boost of energy to help you power through your day with vitality and vigor.
- Enhanced Immune System: Packed with immune-boosting nutrients like vitamins A, C, and E, as well as antioxidants and phytonutrients, spirulina helps strengthen your immune system, keeping you protected against common illnesses.
- Healthy, Glowing Skin: Spirulina's abundance of vitamins, minerals, and antioxidants promotes healthy skin by reducing inflammation, nourishing cells, and protecting against damage from environmental factors, resulting in a radiant complexion.
- Improved Digestion: Spirulina contains enzymes and fiber that support healthy digestion, aiding in the breakdown of food and promoting the growth of beneficial gut bacteria, which can help alleviate digestive issues and enhance nutrient absorption.
- Powerful Antioxidant Properties: Loaded with antioxidants like beta-carotene and phycocyanin, spirulina helps combat oxidative stress, neutralize free radicals, and reduce inflammation, contributing to overall health and longevity.
- Increased Iron Levels: Spirulina is an excellent source of iron, making it beneficial for individuals with iron deficiency or anemia. Adequate iron levels support healthy red blood cell production and oxygen transportation throughout the body.
- Detoxification Support: Spirulina's unique combination of nutrients aids in detoxification by promoting the elimination of toxins, supporting liver function, and protecting against cellular damage caused by toxins in the environment.
Spirulina is a blue-green algae with an impressive nutrient profile. It is rich in antioxidants, B vitamins, magnesium, protein, iron, potassium, and more! It helps detoxify the body, boost the immune system, lower blood pressure, support weight loss, and much more! You can enjoy it daily as a dietary supplement or mix it into your water with chia and lime to make a refreshing Spirulina Chia Fresca!
What Is A Chia Fresca?
Chia fresca, also known as "agua de chia," is a refreshing drink made with chia seeds. It is a traditional Mexican beverage that is simple to prepare and highly hydrating. To make chia fresca, chia seeds are soaked in water or fruit juice until they form a gel-like consistency. The gelatinous texture of the chia seeds creates a unique and enjoyable drinking experience. Often, flavors like lime or lemon juice and sweeteners like honey or agave syrup are added to enhance the taste. Chia fresca is known for its ability to provide sustained energy, hydration, and a dose of fiber and nutrients from the chia seeds.
How To Make A Spirulina Chia Fresca
- Add the chia seeds, spirulina powder, agave, water, and lime juice into a pitcher or mason jar. Stir well to avoid clumps. Then set aside for 5-10 minutes.
- Stir again to loosen any clumps of chia seeds (this is completely normal). Have a taste of the mixture and if it is too tart, add a little more agave.
- Serve with lime wedges and enjoy!
Optional Add-ins
- 1-2 tablespoons of Sea Moss Gel
- 1-2 tsp Moringa Powder
- Fresh Mint or Basil
FAQS
How to drink spirulina powder?
Adding spirulina powder to your drinks is easy. Mix a teaspoon of spirulina powder into your drink and stir to dissolve.
Can you drink spirulina with water?
Yes, you certainly can! Spirulina powder mixed with water is one of the easiest ways to enjoy spirulina. You can also add it to your smoothies or juices. Keep in mind that the spirulina may change the color of your drink to a green or blue hue, depending on the type of spirulina you use.
What is the best time to take spirulina?
Spirulina can be taken at any time of day. Because it is high in nutrients like protein, vitamin A, vitamin C, and more, many people take spirulina first thing in the morning, after a workout, or between meals.
What can you mix spirulina with to make it taste better?
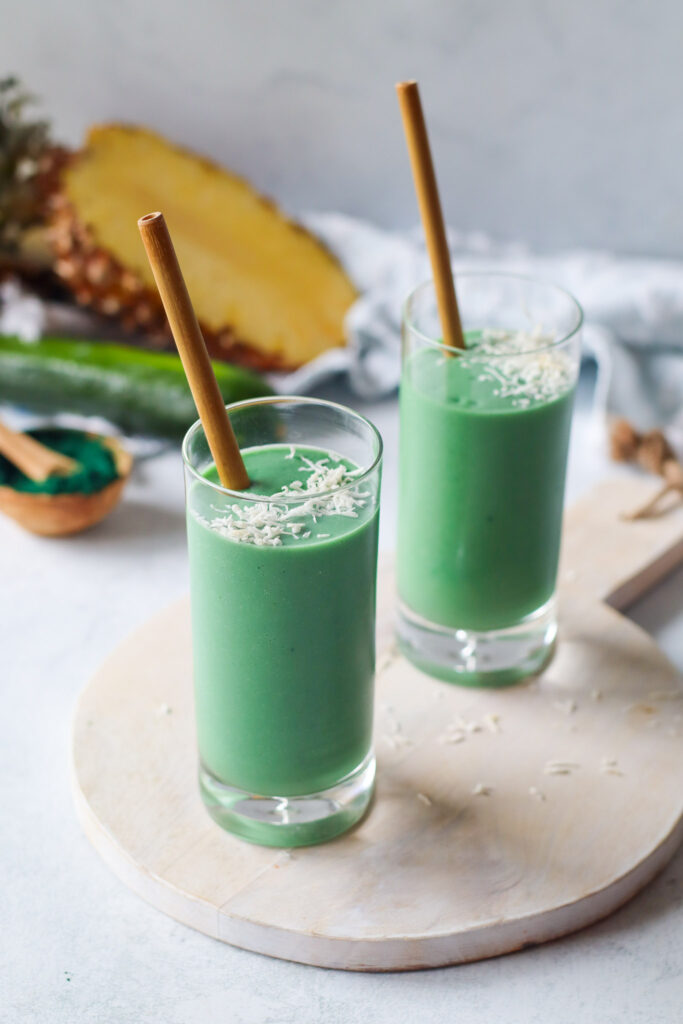
Try mixing your spirulina powder with fresh pressed fruit juices like orange juice, mango juice, or pineapple juice. The vibrant sweet flavor of the juice will help to mask the taste of the spirulina. You can also mix it into fruit and vegetables smoothies where the flavor will be hardly detectable, like in this Tropical Spirulina Smoothie.
We hope you enjoy this Spirulina Chia Fresca Drink!
If you try the recipe, don’t forget to rate the recipe and let me know what you think in the comments. Leave a quick review & star rating ★ below!
More Nutrient Dense Drinks To Try!
Spirulina Chia Fresca (Detoxifying Spirulina Drink)

Spirulina Chia Fresca is a nourishing, detoxifying spirulina drink that takes less than 5 minutes to make! Start your mornings with a tall glass of Spirulina Chia Fresca for an invigorating start to your day. Spirulina is high in antioxidants and nutrients that help reduce inflammation, improve brain health, and remove toxins from the body!
- 2.5 cups Water
- 2-3 tablespoons Chia Seeds
- 1-2 Limes, juices
- 2 tsp Spirulina Powder
- 1 tbsp Agave Syrup (plus more to taste)
Optional Add-ins
- 1 tablespoon Sea Moss Gel (or 1 tsp Sea Moss Powder)
- Fresh Mint
- Add the chia seeds, spirulina powder, agave, water, and lime juice into a pitcher or mason jar. Stir well to avoid clumps. Then set aside for 5-10 minutes.
- Stir again to loosen any clumps of chia seeds (this is completely normal). Have a taste of the mixture and if it is too tart, add a little more agave.
- Serve with lime wedges and enjoy!

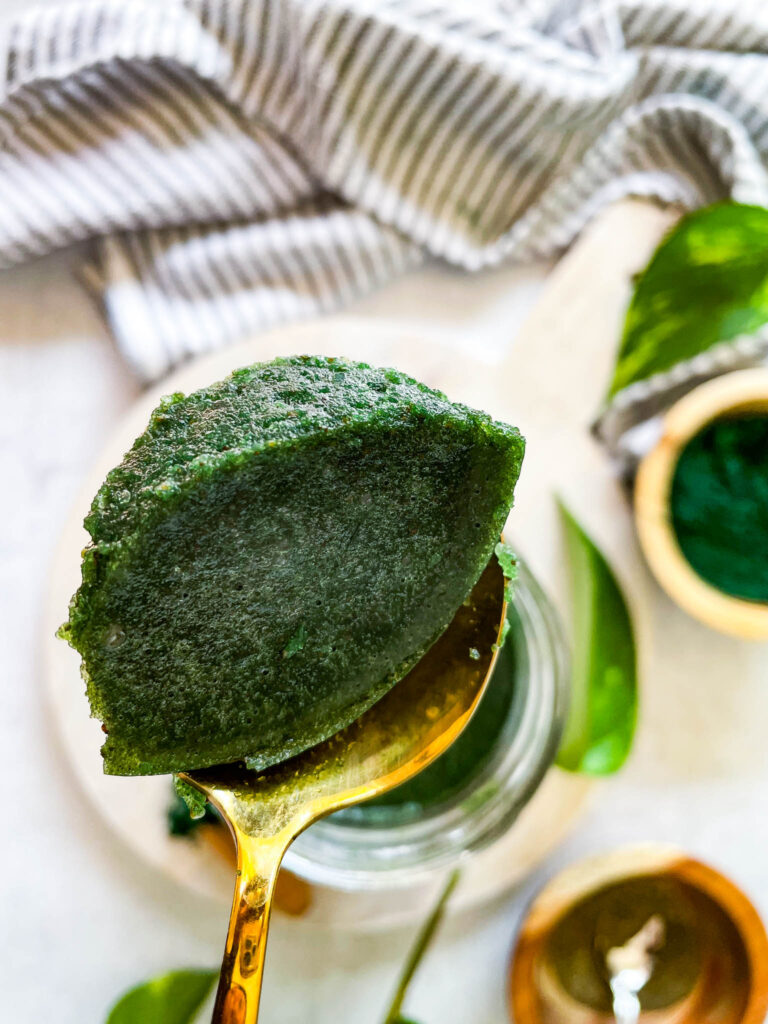
How To Make Sea Moss Gel Without Blender
Learn how to make sea moss gel without a blender, using a simple soak-and-boil method. Aside from learning how to boil sea moss, we will discuss the benefits and uses of this superfood in gel form.
Interested in more nutrient-rich foods? Check out these 10 Benefits of Spirulina next!

What is Sea Moss?
Sea moss (also known as Irish sea moss or Chondrus crispus) is a type of seaweed (red algae) packed with essential nutrients, vitamins, and minerals (like calcium and zinc) that benefit the human body. In recent years, its popularity has grown among the health-conscious and specifically within the vegan community. Aside from its natural state, it can be purchased as supplements in powder, pill, and gel form.
It is native to the Atlantic Ocean and is found between North America and Europe. However, there are other varieties throughout the world including Asia and the Carribean islands.
What is Sea Moss Gel?
Sea moss gel is simply sea moss combined with water, boiled down to a gelatinous form. It is an easy way to consume the algae.
How do you make sea moss gel at home?
The most common way to prepare sea moss gel is to blend it. But before most households had blenders, homemade sea moss gel was prepared by boiling. With this recipe, we'll take it back to the basics and learn how to make sea moss gel without a blender.
Can you boil sea moss?
You can absolutely boil sea moss to create a gel and achieve the same taste and a similar consistency as the blender method.
Reasons This Sea Moss Gel Recipe Works
- Convenient! Healthy choices should be accessible to all. Make sea moss gel without a blender, food processor, or any other fancy equipment.
- Easy! This 2-ingredient recipe is so simple. And the boiling method adds just an additional 15 minutes to the process.
- Versatile! Prepare sea moss gel and add a spoonful to nearly anything to boost the nutritional value!
Health Benefits of Sea Moss
Sea moss has so many benefits. Here are just a few:
Great for Gut Health
Sea moss has a high amount of prebiotics, which replenishes probiotics (good bacteria) in the gut. Consequently, consuming sea moss improves digestion.
Boosts the Immune System
It's a great source of Vitamin C and Vitamin A, which improve the body's immunity. It has anti-viral properties that can help relieve cold and flu-like symptoms.
Weight Loss and Management
The algae are high in fiber, which helps you feel full for longer. This, in turn, leads to less overeating.
Improves Thyroid Function
Sea moss is an excellent source of iodine, a mineral that produces thyroid hormones. This hormone dictates the functionality of the metabolism and determines energy levels.
Ingredients You’ll Need
- Dried Raw Irish Sea Moss: It should be about 29 grams when weighed.
- Spring or Alkaline water: For cleaning and soaking.

How To Make Sea Moss Gel Without a Blender
Start by placing the dried sea moss in a spacious bowl, and then cover it with water. Gently massage the sea moss to get rid of any visible dirt or debris. Afterward, drain the liquid and repeat this rinsing process once more.
Next, take the rinsed sea moss and put it in a large bowl. Cover it with filtered or spring water (avoid using tap water). Ensure that all parts of the sea moss are submerged. Let it soak for 12 to 24 hours at room temperature.

How To Boil Sea Moss
Remove the sea moss from the water and place it in a medium-sized saucepan. Add water until it reaches about half an inch above the sea moss level.


Bring the saucepan to a boil, then lower the heat to a simmer. Stir the sea moss continuously for 10-15 minutes until it fully breaks down (small clumps are acceptable).

If needed, slowly add water and continue to stir to break down. Add a maximum of 1 to 1.5 cups of water to help break down the clumps.

Storage
Pour the Sea Moss gel into a clean mason jar. Let it cool down at room temperature for a minimum of 30 minutes.
After cooling, seal the mason jar tightly and place it in the refrigerator. You can store it there for up to 2-4 weeks. Alternatively, if you want to store it for a longer period, you can keep it in the freezer for up to 3 months.

How to Use Sea Moss Gel
Enjoy the benefits of Sea Moss gel by incorporating 1-2 tablespoons into your daily routine. You can add it to your smoothies, tea, coffee, juice, soups, jams, and more. Get creative and enjoy the nourishing goodness!
Can you eat sea moss gel by itself?
You can eat sea moss gel on its own. If you prefer to eat it by the spoonful instead of adding it to recipes, consider adding a bit of honey or agave so it's easier on the palate.
Tips To Nail the Recipe
- Rinse your dried sea moss thoroughly before boiling sea moss gel. This removes all dirt and debris so you aren't left with any grit in your gel.
- Use spring or filtered water, never tap.
- Don't skip the soaking process. This hydrates and softens the sea moss, therefore making it easier to break down later as it boils.
- The color may fade a bit once it soaks. That is totally normal.
- Ensure the sea moss is fully submerged in water as it boils so that it doesn’t dry out.
- Do not overcook or the gel will be too thick.
- Allow the gel to completely cool before using it.
- Sea moss gel continues to solidify and thicken as it cools in the fridge.
How long do you soak sea moss before blending?
Soak sea moss for at least 12 hours. This is especially important since we aren’t blending but manually mixing the sea moss as it boils.
Why won't my sea moss blend?
Without a high-powered blender, sea moss gel won't be nearly as smooth. However, there are ways to counteract that. Remember to soak the sea moss for at least 12 hours, and keep it submerged in water as it boils so it denigrates. Also, continue to stir it after it is removed from the heat in order to eliminate any clumps.
Does boiling sea moss kill the nutrients?
No. The sea moss simmers at low heat for no more than 15 minutes so the nutrients are preserved.

Now You Know How To Make Sea Moss Gel Without a Blender!
If you try this sea moss recipe, don’t forget to rate the recipe and let me know what you think in the comments. Leave a quick review & star rating ★ below! Take pictures and share them with me on Instagram, Facebook, and Pinterest! I love seeing my recipes come to life in your kitchen.
More Healthy Recipes To Try!
How To Make Sea Moss Gel Without Blender

Learn how to make sea moss gel without a blender, using a simple soak-and-boil method. Aside from learning how to boil sea moss, we will discuss the benefits and uses of this superfood in gel form.
- 1 oz Dried Raw Irish Sea Moss (about 29 grams when weighed)
- Spring or Alkaline water (for cleaning and soaking)
- Start by placing the dried sea moss in a spacious bowl, and then cover it with water. Gently massage the sea moss to get rid of any visible dirt or debris. Afterward, drain the water and repeat this rinsing process once more.
- Next, take the rinsed sea moss and put it in a large bowl. Cover it with filtered or spring water (avoid using tap water). Ensure that all parts of the sea moss are submerged. Let it soak for 12 to 24 hours at room temperature.
How To Boil Sea Moss
- Remove the sea moss from the water and place it in a medium-sized saucepan. Add water until it reaches about half an inch above the sea moss level.
- Bring the saucepan to a boil, then lower the heat to a simmer. Stir the sea moss continuously for 10-15 minutes until it fully breaks down (small clumps are acceptable). If needed, slowly add water and continue to stir to break down. Add a maximum of 1 to 1.5 cups of water to help break down the clumps.
Storage
- Pour the Sea Moss gel into a clean mason jar. Let it cool down at room temperature for a minimum of 30 minutes.
- After cooling, seal the mason jar tightly and place it in the refrigerator. You can store it there for up to 2-4 weeks. Alternatively, if you want to store it for a longer period, you can keep it in the freezer for up to 3 months.
- Enjoy the benefits of Sea Moss gel by incorporating 1-2 tablespoons into your daily routine. You can add it to your smoothies, tea, coffee, soups, jams, and more. Get creative and enjoy the nourishing goodness!